4.30.2010

Show and Tell - Part 2 - Weekender Tote and Free Pattern

Wow! I didn't mean to leave the blog for that long.  Right after I posted the giveaway (quick, hurry! only one more day to enter!), a got to go on a little trip to North Carolina to visit my sister.  I must say it was fabulous, rejuvenating and I miss her like crazy!!  Good thing she's coming to Utah in two weeks for a wedding.

So back to this picture where I showed two things I made.  First the dress (how-to details to come soon!) and second this weekender tote. 


I love this tote!  I had such a great time picking out fabrics.  I wanted something springy and bright and when I found the floral fabric, I knew it was the one.  Inspired by Jackie, yet again (Jackie, I dubbed thee Color Queen.), to be more adventurous with my colors, I added the bright turquoise, heather gray and grounded it all with a small white polka dot on black fabric.


It's quite roomy too.  I know this because I did a wee bit of shopping while on my trip and my sister; her husband and I packed it to the brim to come home.  PACKED!  As in 8 plates, pretty pedestal bowl thingy, dainty tea cup, cigar box, jewelry box, 5 pairs of earrings, necklace, flower pendant, belt, 3 magazines, a jacket, a sweatshirt, pj's, and a dress and jacket for my daughter.  All in that bag and yes, it was extremely heavy!  I was pleased that the sewing held up.  No ripped seams or torn handles to report. 

I bought the magazine, Sew Spoiled, which this pattern was featured in.  I struggled a bit with some parts but was able to get some help.  Even though I really had to think about some of the steps, it wasn't very hard.  Overall, I am pleased with the tote.  However, I don't like the way the straps pull the fabric up when you are carrying the bag.  Something I am sure a more experienced sewer could fix.

After it was done, the magazine came out with a FREE full pattern because of the difficulty of the shortened pattern.  Found here.  And double lucky you, because they are starting a sew along right now!  Details found here and flickr group here.  I just posted my finished tote and I am really tempted to make another.   If you join in on the fun, come back and tell me!  I would really love to see your finished tote!

4.22.2010

Tassel Love and a Giveaway

***giveaway closed***

So the Nester is having a linky party for your favorite tassels.  If anyone is coming on over from that linky party, you understand and love tassels just as much as I do.  I started making them over two years ago and haven't stopped!  I especially love to make seasonal tassels.  They are just so much fun to play with! 

I wanted to share my favorite tassels that I have made over the years but as I was looking through my pictures, I realized that I loved way more than I have time to share.  So consider this a highlight reel of the tassels I love.


Phew!  If you scrolled down this far, you deserve an award!  To celebrate my birthday this week and since it's always fun, let's have a birthday celebatory giveaway!  This new springy tassel is up for grabs just in time for Mother's Day too!

Would you like to win this tassel? giveaway closed - thanks for entering!  Just leave me a comment telling me about your favorite tassel (it doesn't have to be mine, you can share yours too!) and you will be entered into the drawing.  Be sure to leave someway that I can contact you if you are the winner.

Want more entries?  Do any or all of the following and then
leave a comment for each one: 
  • blog about the giveaway (be sure to link back here)
  • Facebook about the giveaway (again, leave a link)
  • or for 5 additional entries, make a purchase from my Etsy shop
*Giveaway ends April 30th.  Will ship internationally.

Thank you and good luck!


DIY Day @ ASPTL

4.21.2010

Two projects - 1st show and tell

Here's a picture of two things I made, not cooperating being photographed.

A springy dress and a new bag.  I love them both and wanted a fantastic picture of each.  Alas, it was not happening, so just regular old pictures will have to do.

First up, a simple springy dress for my daughter.   This was her wearing it right after I made it for her a few weeks ago.  She was so thrilled about it!  We felt like it was springy so we went outside to take pictures but didn't really look to see that the yard was still hibernating.  And needs a lot of work.  BUT, we are looking at the cute girl in the cute dress. 


There is nothing better than making something for your child and having them love it!  She told me that the dress was perfect for jumping and proceeded to jump all over the place.  Love that little silly one! 


I'll be sharing more about how I made it soon!

4.20.2010

made by the mama monster guest post


hi! i'm jackie from made by the mama monster. i'm a stay at home mama to three little boys. they keep me busy, but in my spare time i try to get some crafting in. it seems like the time for crafting is getting fewer and farther between. i like to make things that i can work on with my boys around .short and sweet.

megan asked me to guest post over here at megitys handmade and she pretty much told me i had to do my hedgehog applique. i usually do what people tell me...

supplies-
-some sort of fusible stuff. i love steam a seam. it is a bit more expensive but it is so worth it. you could also use fabric glue, wonder under, whatever.
-fabric and felt
-some embroidery floss
-template


ok, here we go. print off template. i like to do it on cardstock so it holds up well. fuse your fabric to your steam a seam using instructions provided. trace your hedgehog onto the paper side of the webbing. remember that he will be backwards so trace him the way you want him to face ( or use a disappearing marker and trace him directly onto the fabric.)


how easy is that? some visit me over at my place and see some of my other tutorials. thanks megan for inviting me over to your awesome blog.

4.17.2010

What + what = ?

So this is how my yard looked most of last week.  Very springy yes?   Begining of Spring break no less. 

And this is what happened to my husband's car that first night of snowing. 

Spun right across the freeway after hitting a patch of ice.  Thankfully, he didn't hit anyone else and he was okay.  Scary yes?

Dreary weather + totalled car = less than enthused Me.

This next week offers a ray of sunshine though.  New tutorials and show and tell.  Wahoo!
Until then, have a great weekend!!

4.13.2010

Guest Posting Today

Hey everyone! I'm gues posting my ruffle bumsie tutorial over at Nicole's blog Our Cozy Nest. Come on over and see me!

4.11.2010

Ruffle Bumsies How-To

Ruffle Bumsies How To

If you aren't making your babies bums ruffly by now, here's how I made mine.  Now you have no excuses to not ruffle that darling round baby rump.

Here's what you will need:
  • Onesies of your choice.  I simply used a package of white onesies, but there are some colored  $3 onesies at Wal-Mart.  I found that out after I made mine.
  • Several different fat quarters to choose from.
  • Scissors and/or cutting mat and rotary cutter.
  • Sewing machine
And here's how I did mine:

1.  First I begged my cute friend Jackie to let me come over and serge my strips of fabric.  If you don't have a serger, don't worry about it because this can still be done!  You can do one of two things.  Either cut your strips of fabric with pinking shears to the size you want.  When it's washed, it creates a little raggy edges that are really cute on that baby bum.   Or, cut your fabric twice the width of the finished ruffle you want and simple place right sides together and sew down the long edge.  Turn right side out and then continue on with step 3 of the tutorial.  (Make sense?  Feel free to ask questions.  I won't bite!)

2.  Using fat quarters is the simplest way for me.  Since your fat quarter is already 18x24, the width is just right to make quick ruffles.  Cut several 1.5" strips along the 24" length.  Now serge these strips.  (Or cut with your pinking shears or making your tubes of fabric.)


3.  Next, turn your sewing machine's tension up and the length of your stitches as long as you can.  Leaving a long tail of thread, sew down the center of your strip.  The fabric will ruffle as it is sewn.  Be sure to leave a long tail of thread at the end too.  I always test on a piece of scrap fabric to make sure it is working right.  I don't like unpicking if I don't have too.  Now your strips will look something like this. 

4.  Work your strips to the width of your onesie.  Now would be a good idea to mark your onesie with straight lines with a fabric marker.  This will help you keep your lines straight as you pin on the ruffles.  I was feeling adventurous and didn't mark these lines.  It has nothing to do with the fact that I didn't want to go and find said marker.  Nothing. 

5.  Starting with your center ruffle, pin onto the onesie.  Folding the raw edge down, sew down the center of the ruffle.  Darling already! 


6.  Add your next ruffle above the first.  I tried to make them as close as possible since when the onesie is on that cute round baby, the ruffles spread out and you can see the white peeking out in between the ruffles.  Lifting the edge of the ruffle that was sewn down, pin the next ruffle in and sew down the center.

7.  Repeat for the third ruffle and then TA-DA!  You just made a darling ruffle bumsie!


*There are so many variations on this.  You can use all the same fabric or multiple fabrics.  You can make your widths of your ruffles smaller or bigger.  You can have more than three ruffles.  I think that this would be cute with five 1" ruffles smashed close together with the pinked edges.  This would make one fluffy and ruffley bum!

I felt that the front of the onesie need a little more so I twisted and sewed an extra strip of fabric into a little flower with a scrap of fabric for some free handed leaves.   This fabric will fray a bit in the wash but I like that unstructured look, but if you want to minimize this, just finish your ends anyway you like.


And remember the cutest hedgehog onesie ever?  I twisted Jackie's arm and made her promise me that she post a tutorial.  And guess what?  She's going to do it on my blog!  Lucky me!


Making

4.05.2010

Blog Swappin' with Nicole from Our Cozy Nest

I'm excited to do a little blog swapping with my friend Megan today. I asked Megan what she thought I should do a tutorial on and she said my kitchen cabinets. I'm thrilled to post about this, it was definitely one of the biggest things we've done to our home and wow, what a difference it made.

Here are a couple before pictures...................................


After............................................


I think that painting our cabinets black was one of the best decisions we've made. EVERYONE thought we were crazy at first, including my brother n' law who is a home builder, but I'm so glad we were gutsy and went through with it because we love them.

Soooooooo if your thinking of painting your kitchen cabinets here is my little tutorial and some tips we learned along the way.


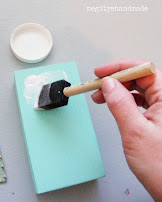
We took the cabinet doors and drawer fronts off. We set up a little work station in our garage and gave them a good sanding . (Buy a box full of square foam sanders, it's a little more expensive than just sand paper but you'll be glad you spent the extra money.) Wipe them off after with a damp cloth.

WARNING: Unless you really like black, mask your working area off really well. If possible use cloth drop cloths on the floors because with plastic the paint gets tracked everywhere.

My husband hung them from ropes in our garage by tying them to a nail that he put on the inside of the doors so the hole wouldn't be seen. We rented a sprayer from Sherwin Williams. I really would recommend this for a nice smooth finish. We primed them first with a coat of grey primer, (unfortunately you can't get primer in black). Let them dry and then lightly sand them again.


Now give them their first coat of black paint. We used exterior laytex black paint from Sherwin Williams. We ended up giving them two coats of black paint, but looking back I think I may have even given them a third, especially the ones that get more wear and tear like the ones under the sink. Inside the house I used a small foam roller on everything else.

After we had let them dry for a couple of days, I distressed them a little and then we painted a clear satin coat over them with a foam brush. (I did this while they were hung up in the kitchen again.) Another thing we did that made a HUGE difference was put up a little molding at the top of the cabinets, and added new hardware.

And there you have it, I hope I covered everything. If you are thinking of painting your cabinets black here is the post that inspired me to do it. Now, if only I had the money for granite counter tops and an updated stove :) .

If you have any questions feel free to leave a comment over at my blog Our Cozy Nest and I will do my best to answer them.

4.04.2010

Paper from the Heart

My good friend Teresa is the most talented paper crafter I know. She whips out project after project, all fantastic of course, making it look simple. I was just on her blog this morning admiring her creations when I came to this cute birthday calendar that she has created for their scrapbook retreat.


Isn't it wonderful? In our family, we have waaaaaay too many birthdays to remember each month. I admit, I am horrible at remembering them. (So sorry to birthdays that have fallen from at least October 2009-March 2010.) Do you think if I have a cute calendar like this that I will remember all those birthdays?

Teresa is known for her attention to detail. Look at all that cuteness on there!

I think the December "WISH" banner is my favorite page so far.

I had to of course beg her to let me buy a kit from her. Crossing my fingers she says yes!

Teresa also has a fun Make at Home Card club that you can join here. Her cards are fabulous! I can't believe she can come up with so many different designs!

4.03.2010

Want To Do's

I admit, I've been reading blogs way more than I should be. It's a problem because not only do I neglect my motherly duties, I keep adding to my want to-do list and don't actually get any of them done. Then in turn, not getting anything done and just adding to the list drives me crazy! It makes me feel like I am so behind even though I have done it to myself. Am I the only one that is crazy like this? I sure hope not.

This week, I came across a few lovelies that I wanted to share. Some of these are on my want to do's and some are not. Enjoy!

*******************************************************************

Bijou Lovely is making a houndstooth quilt. Isn't it fantastic?!? Oh how I love houndstooth! I'm trying to work it into my bedroom re-do.


Speaking of houndstooth, how darling is this quilt that Jackie made for our friend Kem's sweet Evie Rose. Feminine and girly without being pink and overly sweet.


Jenny at Little Green Notebook posted about her friend lining her kitchen cabinets with fabric. I tell ya, it's sooooo simple you won't believe it! I love this kitchen! I'm really drawn to dark countertops and white cupboards. Someday, maybe someday, I'll get to work on my kitchen that is currently the same color of fake wood and dark blue carpet.


I still want to make this headband from Blue Cricket Designs. Isn't it cute??


These are just a few of the lovelies I came across these past few weeks.  Believe me when I saw that there are a lot more pretties that I have bookmarked. 
Related Posts with Thumbnails